I’ve been searching for this all afternoon! The old way of resetting the OS X setup assistant via single-user mode and directory services dscl no longer works in Yosemite (and possibly Mountain Lion and Mavericks; I haven’t tried it since Lion). I discovered a new way by running across this engadget post. I modified step 5 to include the users folder. Here’s a quick summary:
Boot into single-user mode by holding down Command-S on the keyboard during startup
At the command-line prompt, type mount -uw /
rm -R /Library/Preferences
rm -R /Users/YOURUSERNAME/ <– replace YOURUSERNAME with whatever your user name is
cd /var/db/dslocal/nodes/Default/users
ls (to list the files)
Delete the file that is named after your user account with a .plist extension. For example, for user name “stevesande” you’d type rm stevesande.plist
rm /private/var/db/.AppleSetupDone
reboot
For my purposes, I omitted step 3 and everthing worked fine.
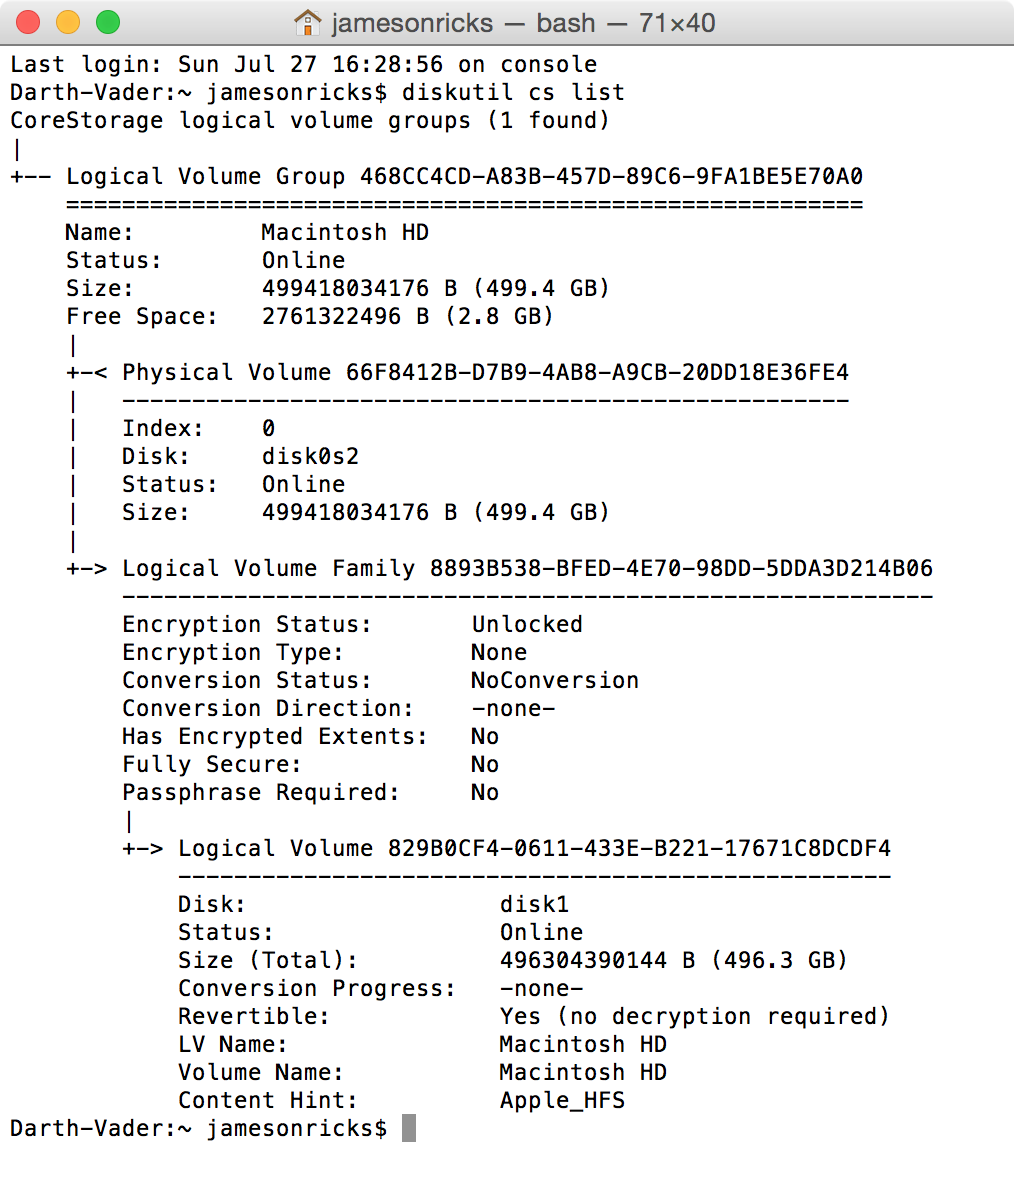
Many users around the net have been realizing after installing the OS X Yosemite beta the partitions on their hard drive were converted to Logical Volumes. I’m not entirely sure why Apple chose to do this, but it makes resizing and deleting partitions on the fly 10x harder! I haven’t found a good solution as of this writing, but make sure you are aware of this!
Apple introduced “Core Storage” with the release of OS X 10.7 Lion. All Fusion drives use Core Storage. A Fusion drive is pretty much just an SSD and traditional spinning hard drive combined into one logical drive. Normally these drives would show up separately, but with the help of Core Storage, they can be turned into one logical volume. It’s possible to create your own Fusion Drive with a separate SSD and HDD by using Core Storage. There are a few tutorials around the web that can help with this. I’ve created 3 of my own “Fusion Drives” using these guides.
Some people have ran into a problem with creating a bootable USB installer for the Yosemite Beta. The script located in the Installer app called “createinstallmedia” does not work quite yet on Yosemite like it did in Mavericks. I kept getting an error that told me my volume wasn’t a valid mount point.
After doing some research, I came across a post on MacRumors.com that had a workaround. Just run the following commands in Terminal and you’ll be good to go!
I know this is a couple weeks late, but for those wondering, the OS X 10.9.4 update is safe on a 2006/2007 Mac Pro that’s hacked to run Mavericks. There’s no need to replace the modified boot.efi file if you’re going from 10.9.3 to 10.9.4. But, if you are using a combo updater (i.e. from 10.9.2 to 10.9.4), you will need to replace the boot.efi file.
I will write a script soon that will allow you to boot up on the Recovery Partition and run a script from Terminal to automatically replace the bootloader files. Stay tuned…
This little guy came into work the other day. This machine is probably one of the coolest that Apple has ever made! Brand new they costed $7500!! And even today, this collector’s item is selling for anywhere between the $1000-$2000+ ballpark. It’s amazing that something so old can still keep it’s value. Here’s an excerpt from the description over at everymac.com:
The unique Apple 20th Anniversary Macintosh, based on an internal design similar to the Gazelle architecture, features a 250 MHz PowerPC 603e processor, 32 MB of RAM, a 2.0 GB hard drive, a vertically oriented 4X CD-ROM drive, an ATI 3D RAGE II graphics processor with 2 MB of SGRAM, S-video input, TV/FM Radio capability, and a custom Bose speaker system all packed in a custom, one-of-a-kind case.
The 20th Anniversary Mac shipped with a unique keyboard with an integrated trackpad and Italian leather palm rest as well as a large external Bose subwoofer.
I won’t lie, when I first saw this machine I geeked out pretty bad. This is the first one that I had ever seen in person! A couple coworkers and I decided to test out the Bose speakers. After all, Bose is one of the best right? We downloaded iTunes 2.0.4 from macintoshgarden.org and popped in a CD and played some tunes! I was quite impressed with the sound quality coming from the 17 year old speakers!
This particular machine had been maxed out all the way with the processor upgraded to a 500MHz G3 and RAM maxed out at 128MB! All in all, this machine is cool enough to make anyone’s head turn.
So it turns out, the processors I bought weren’t correctly matched. One would consistently run about 10 C hotter than the other one. Luckily, the guy I bought them from on eBay was able to exchange them for me. (Don’t worry, I gave him good feedback!).
I should be able to put the new processors in this weekend sometime. Stay tuned for an update!
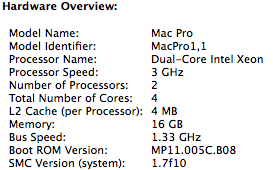
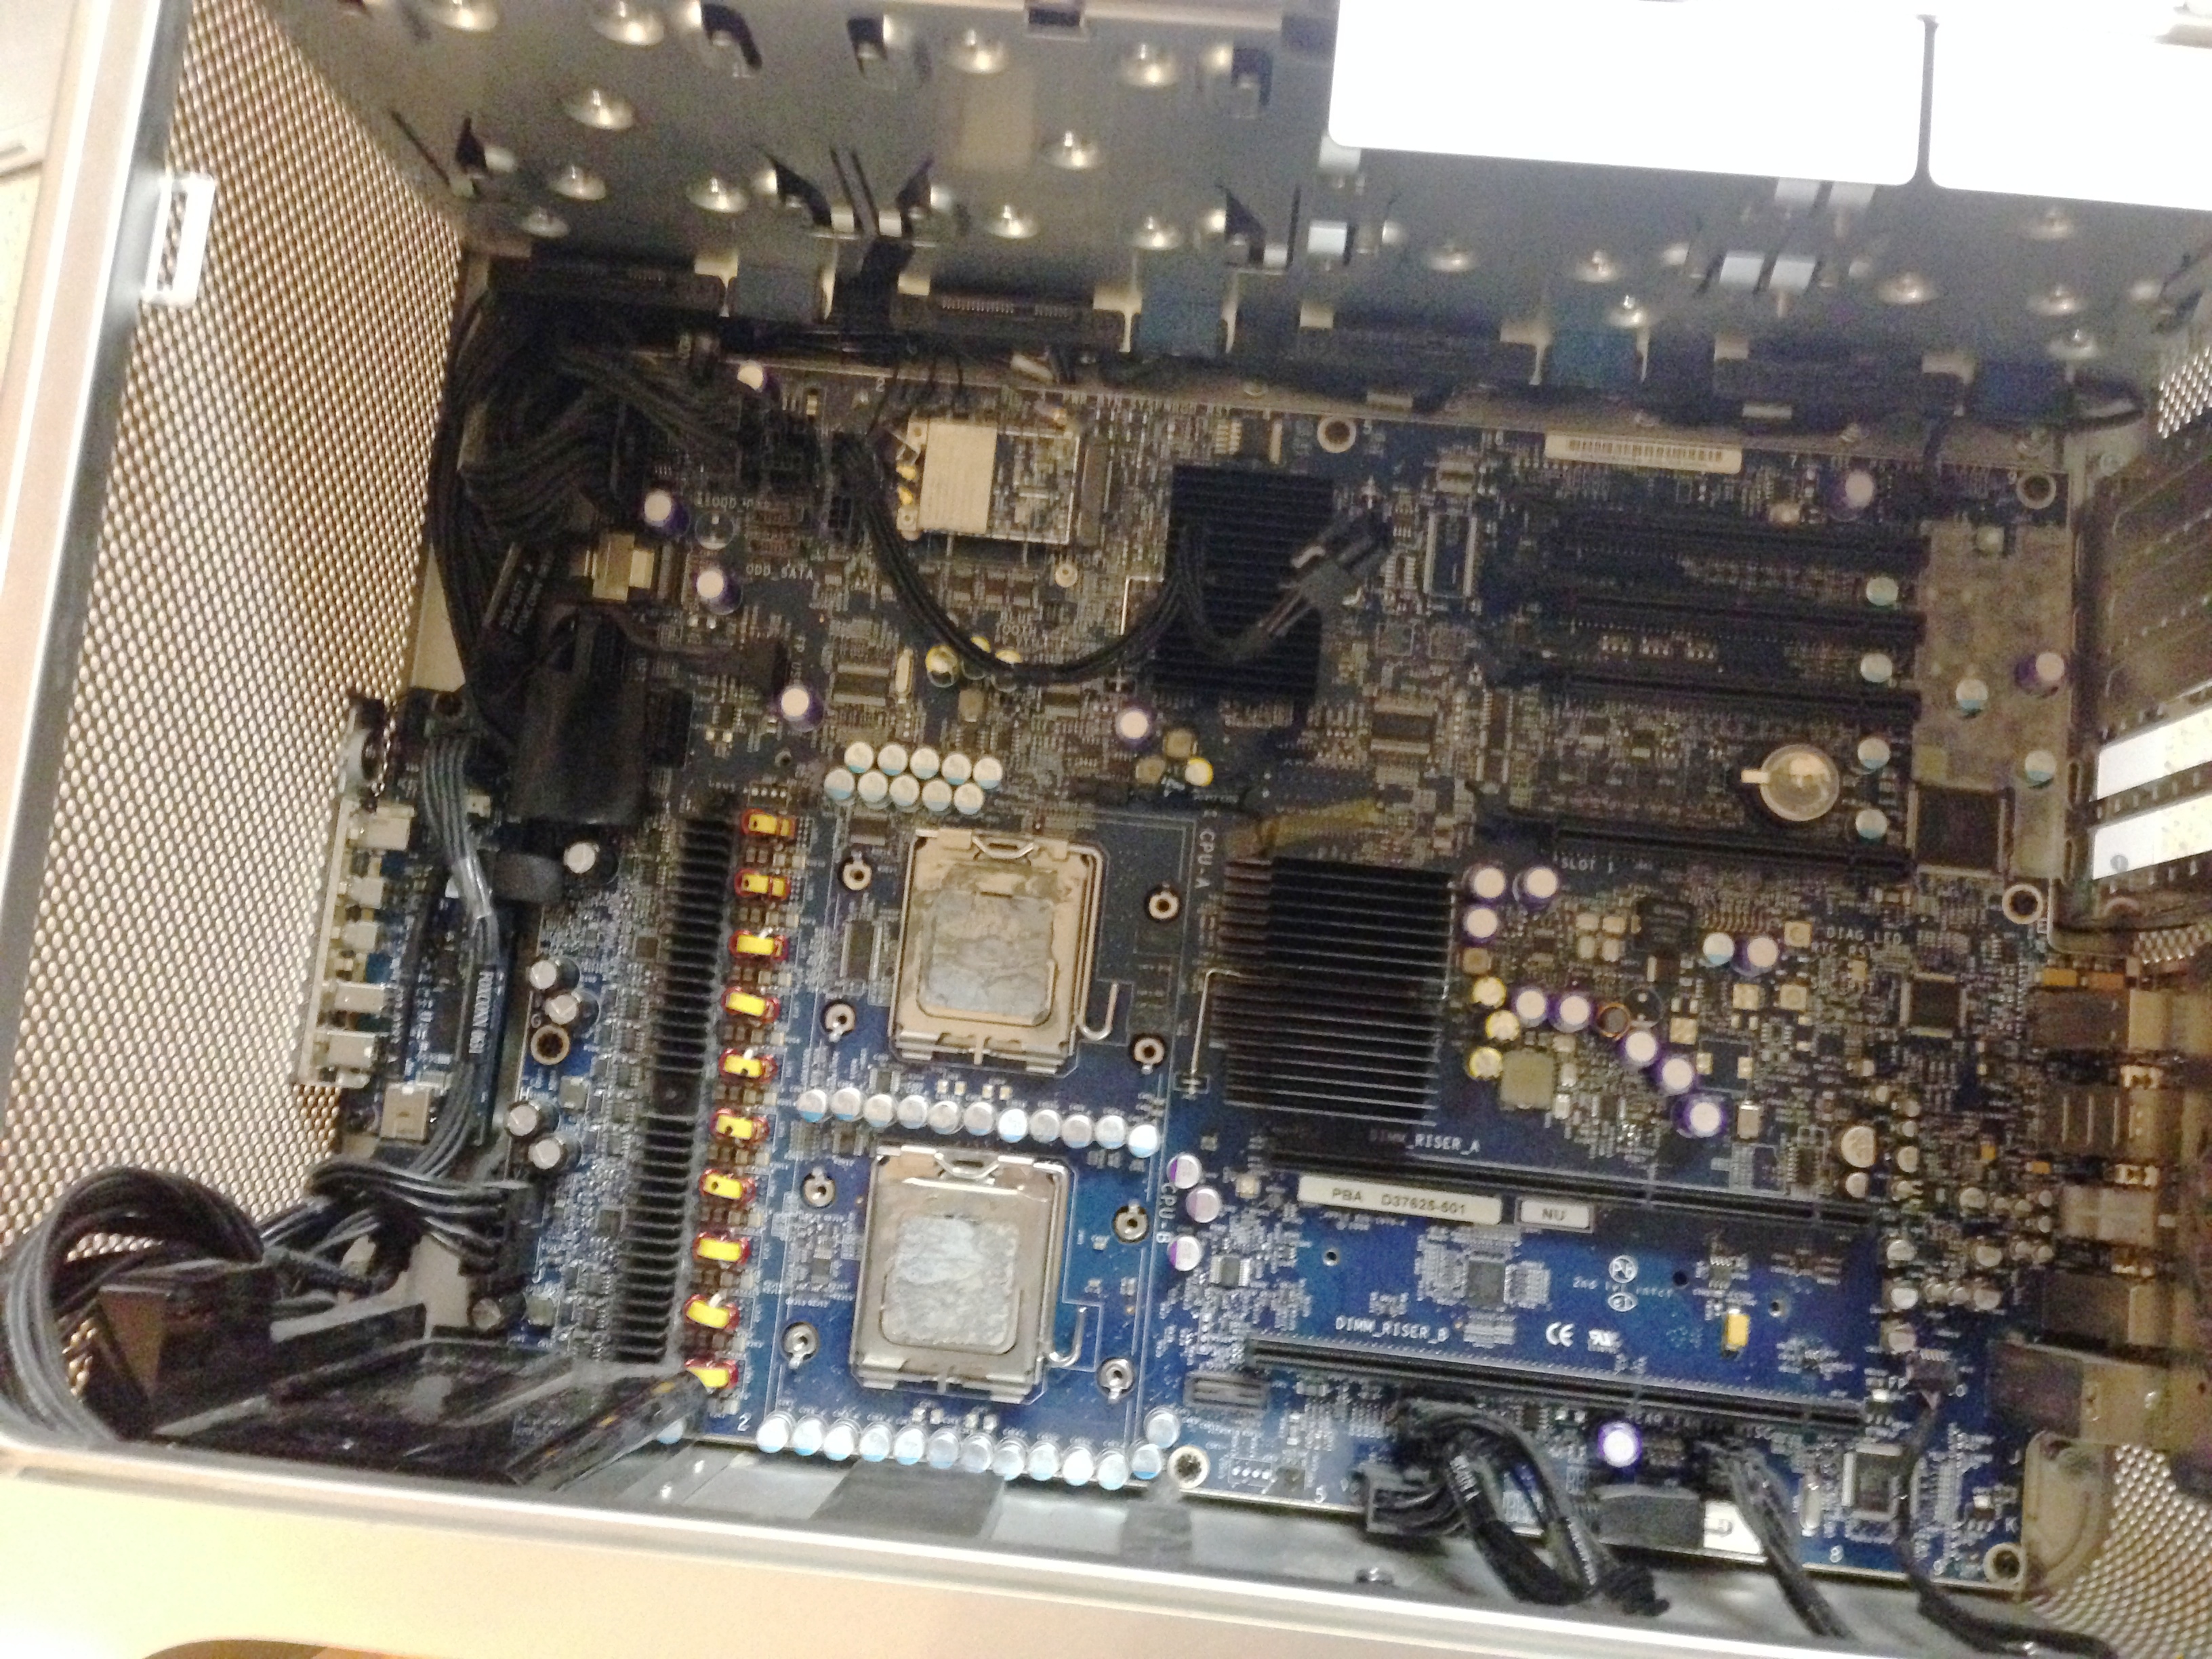
Recently, I had an original Mac Pro fall into my hands. It’s the Quad-Core 3Ghz model. It’s not a bad machine for being free! The interesting thing is that this old Mac Pro geekbenched higher than my Hackintosh that I made a few years ago. So I figured it was time to scrap the hackintosh and go with the real Mac!
The only caveat is that the original Mac Pro doesn’t “officially” support OS X Mavericks. However, with the help of some people over on forums of MacRumors.com I was able to get it installed. I needed to upgrade the graphics card though since Mavericks doesn’t support the GeForce 7300GT that came with the original Mac Pro. Luckily I had an old PC GeForce 8800GTS that works just fine in the Mac Pro (as long as you’re running Lion or higher!).
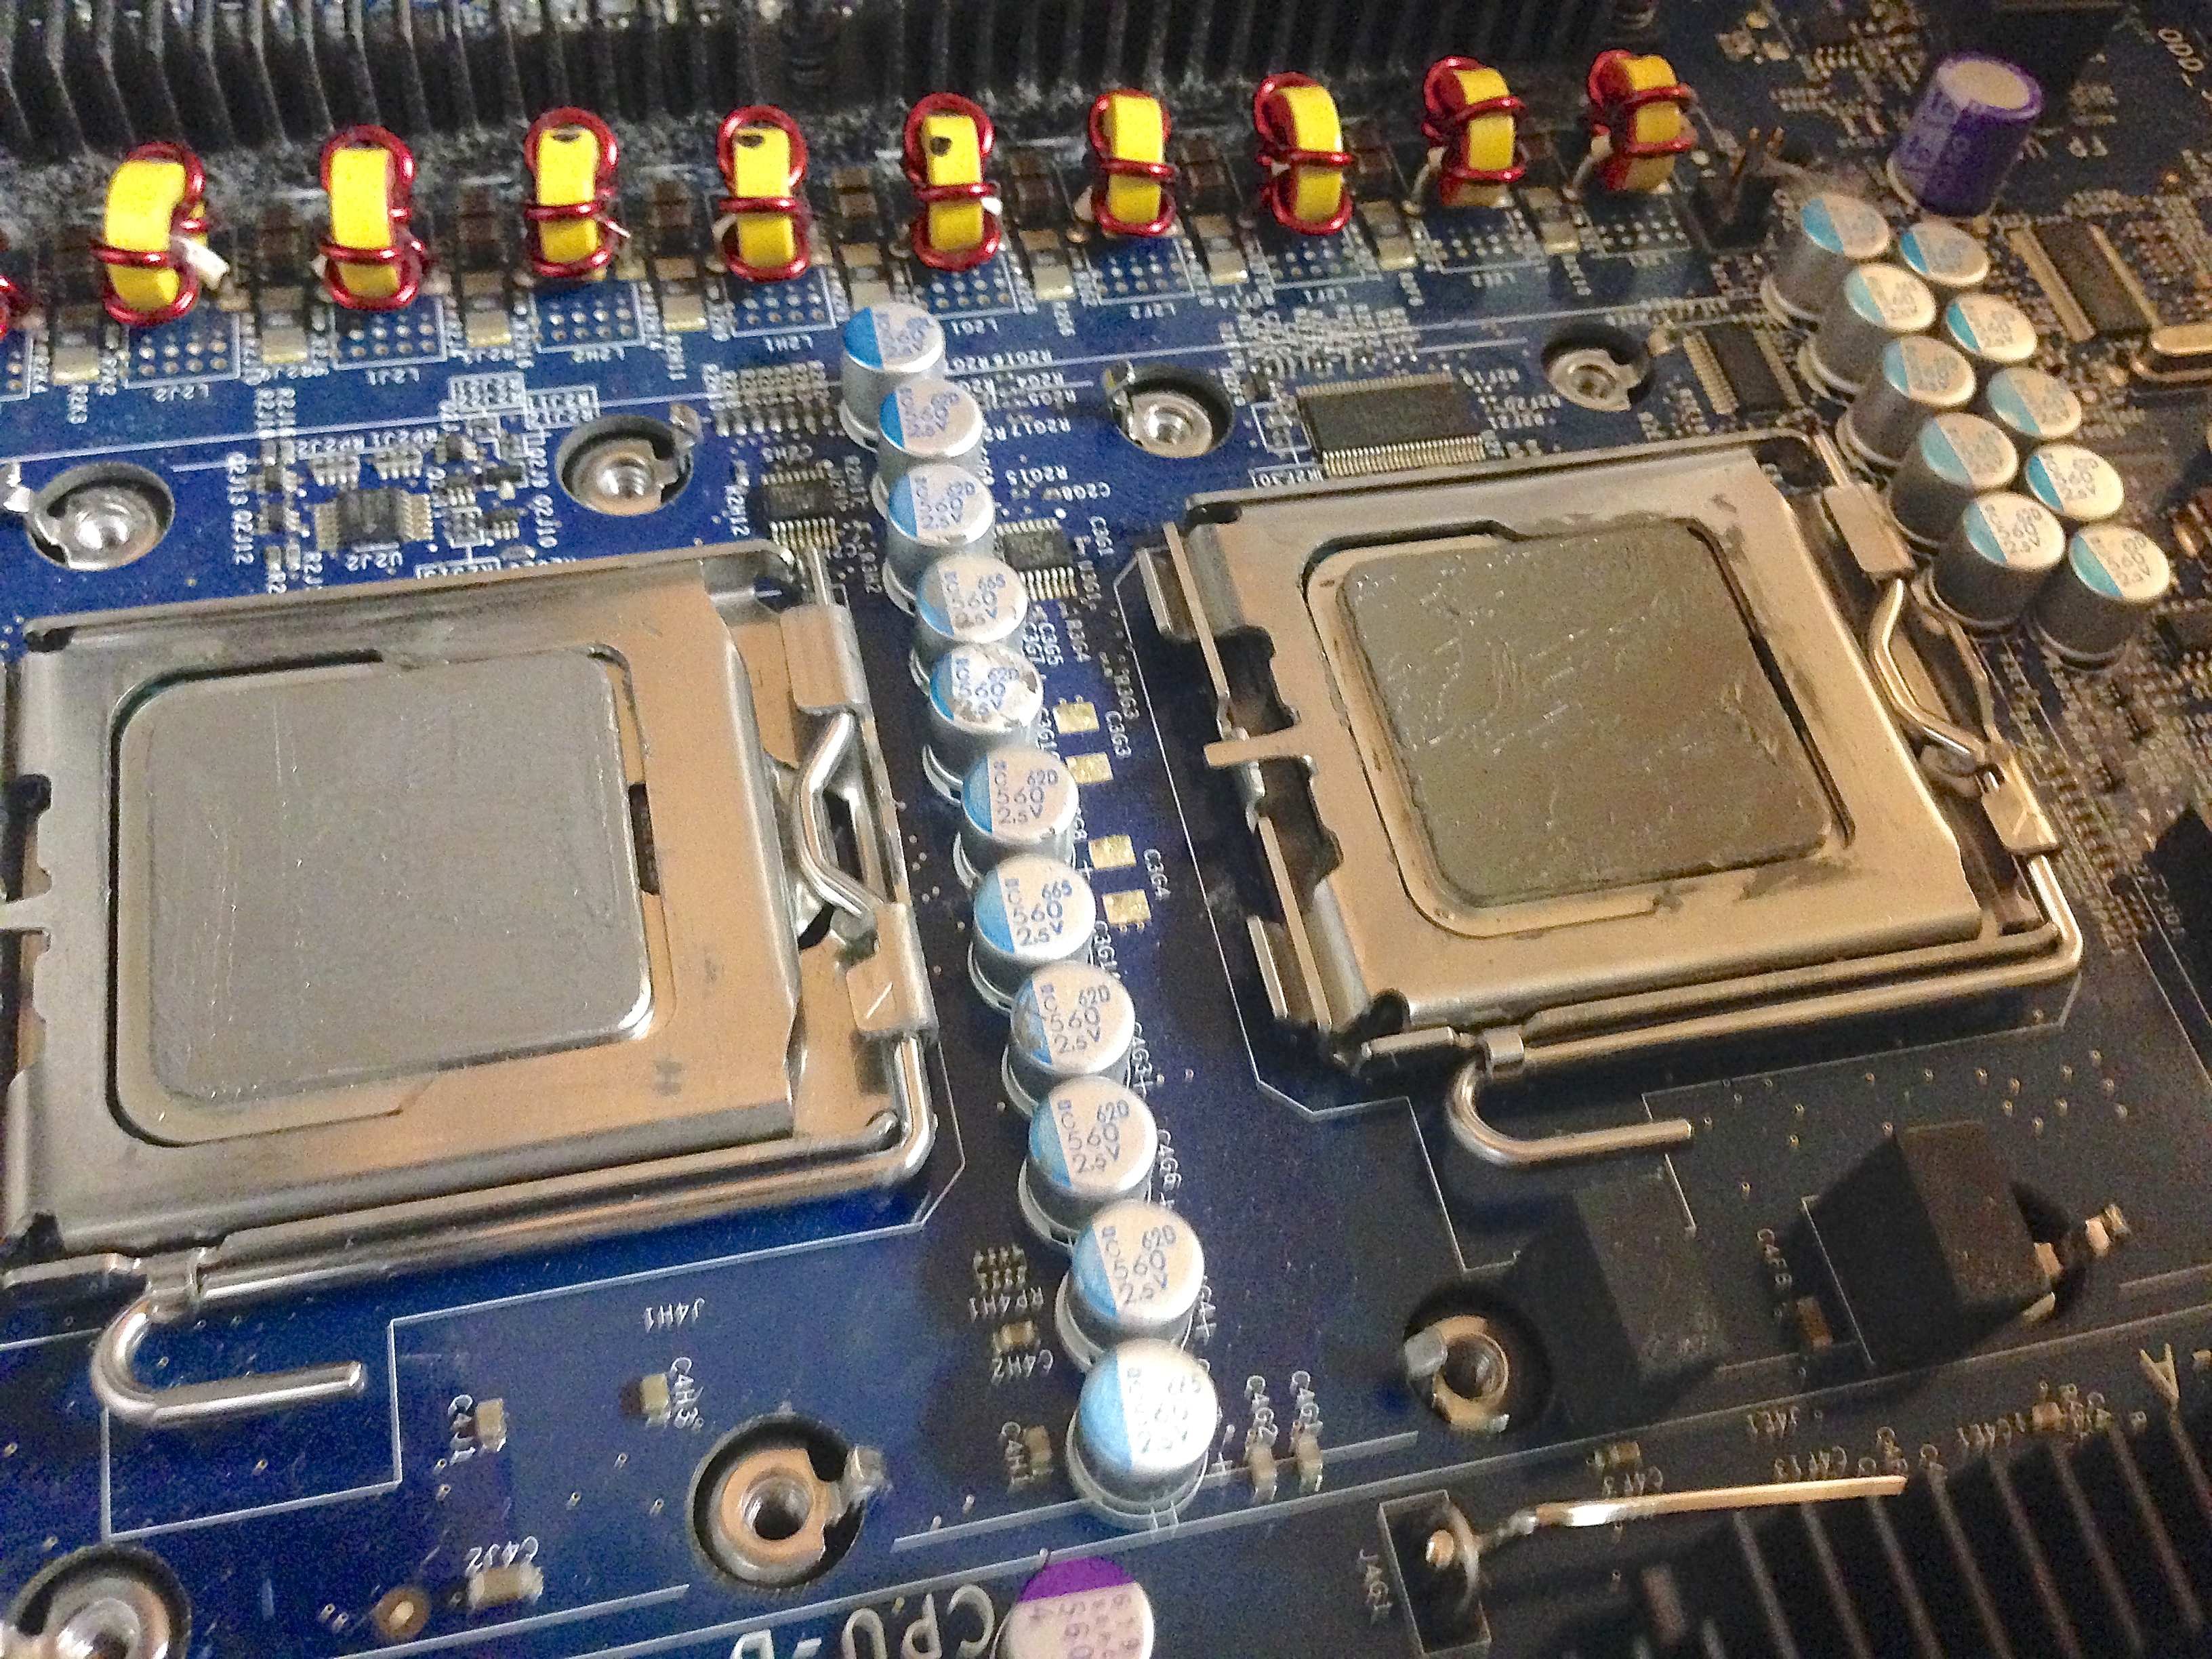
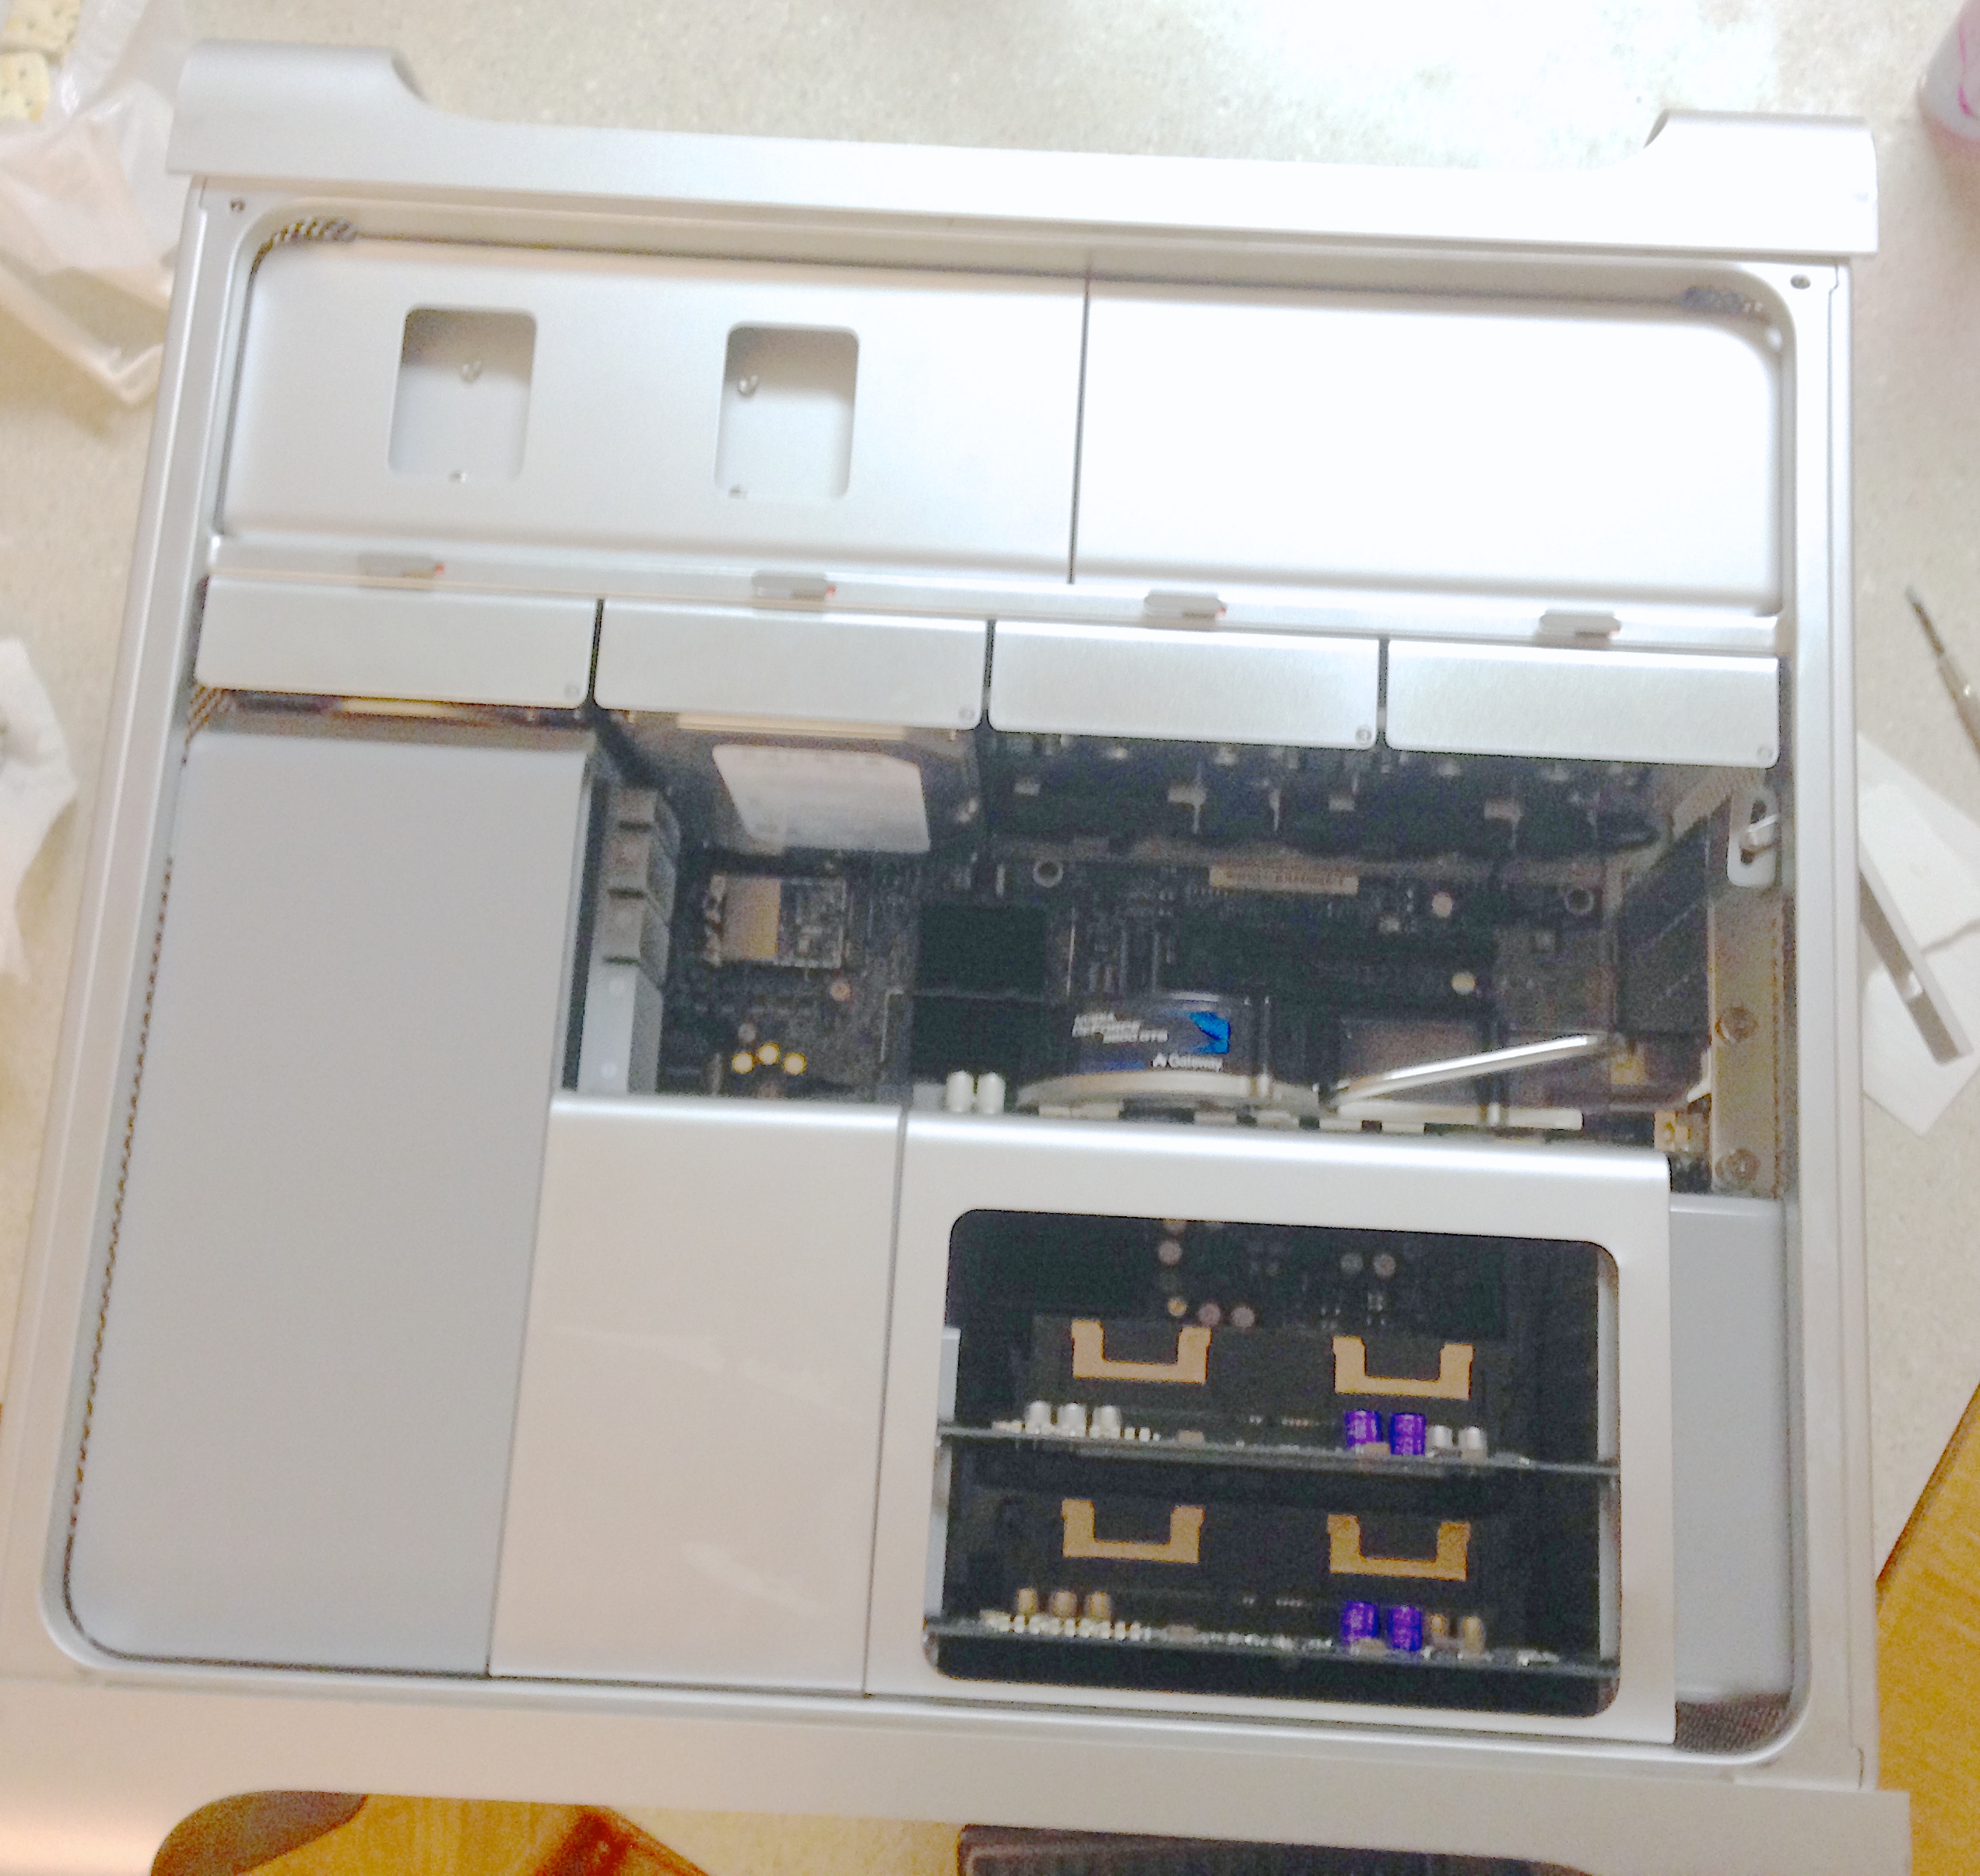
One problem with this free Mac Pro was that it was missing the memory card cage and rear fan. I purchased one of those off eBay for $20. For the mean time I had to hold the memory riser cards up by using so electrical tape (see picture below). I wanted to get some extra performance out of this Mac Pro to put it in a closer category with my 2.6Ghz i7 Retina MacBook Pro so, naturally, upgrading the processors seemed like a great idea! Apple released an 8-core version of the original Mac Pro and dubbed it the MacPro2,1 (as opposed to the MacPro1,1). This official 8-core version used two 3Ghz Quad-Core Intel Xeon X5365’s.
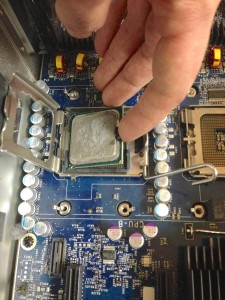
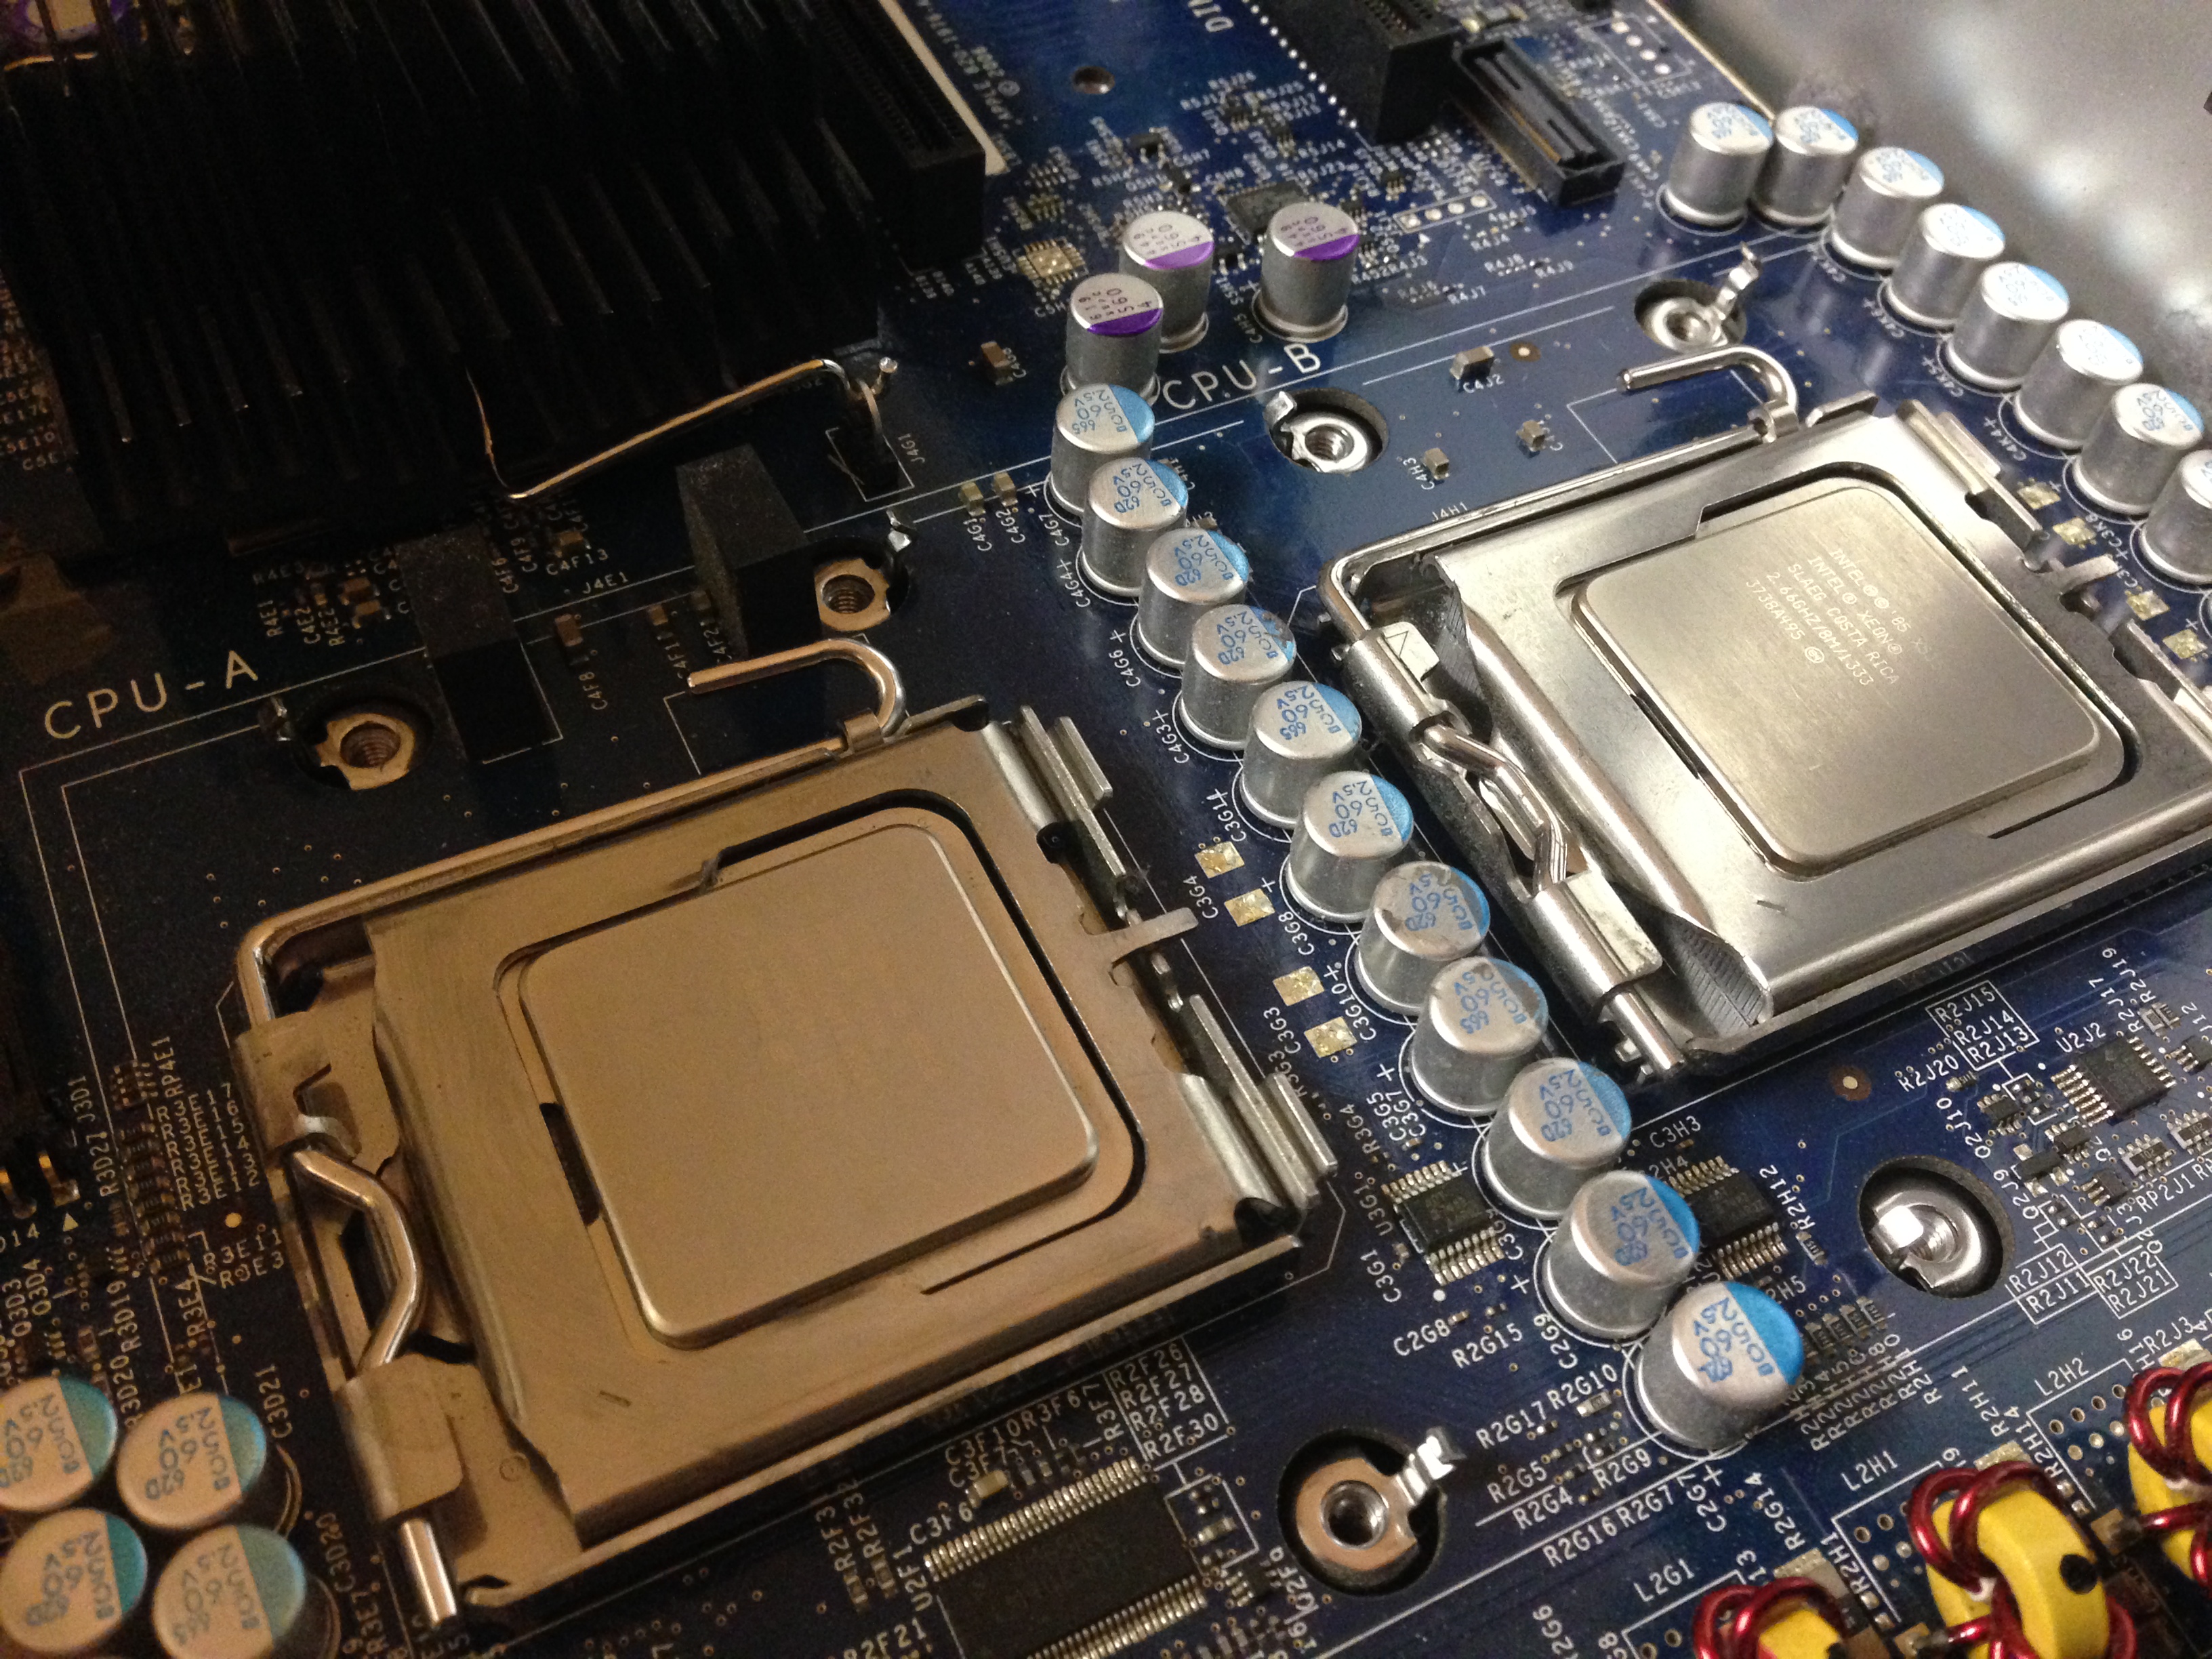
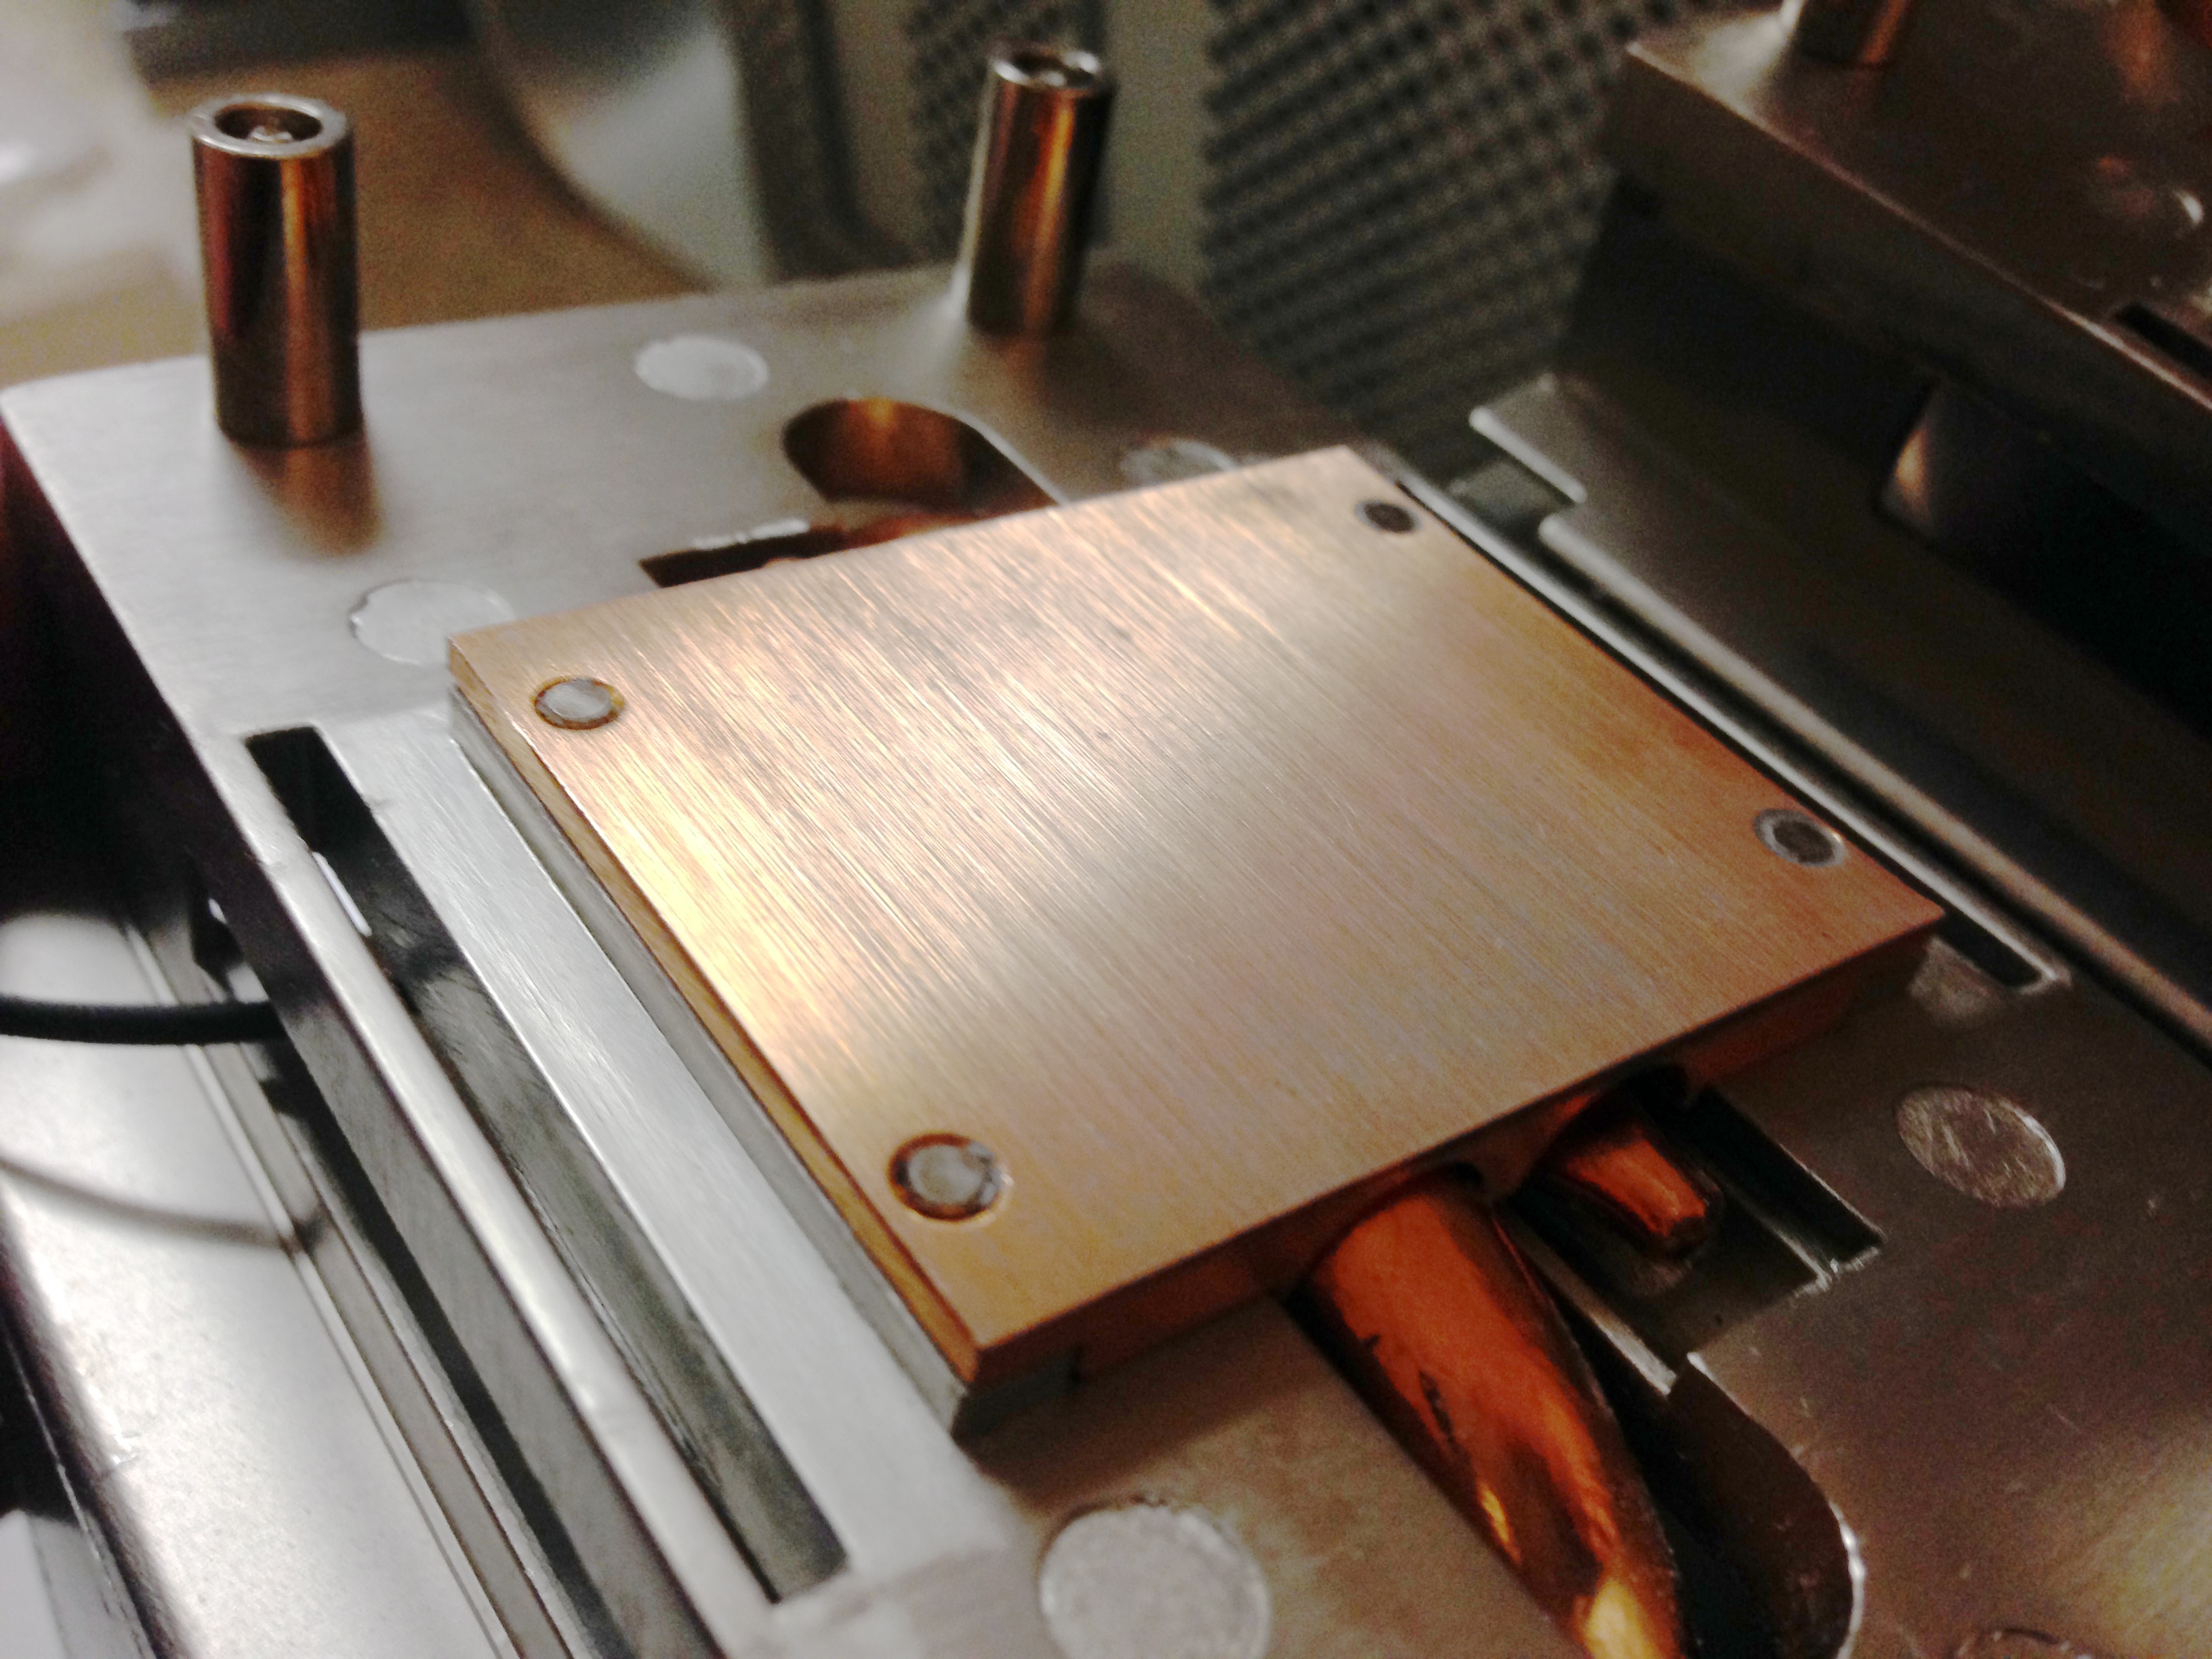
Looking on eBay, the only X5365’s were close to $200! Most were being advertised as an upgrade kit for the original Mac Pro. I decided to look at some similar processors and settled on the Xeon X5355. This processor is literally the exact same as the X5365 but runs at the lower clock speed of 2.66Ghz. I found a matched pair on eBay for $60! So I purchased them, along with some Arctic Silver 5 thermal paste and 16GB of DDR2 RAM for $25 at the local computer shop. The upgrade process went smoothly!!
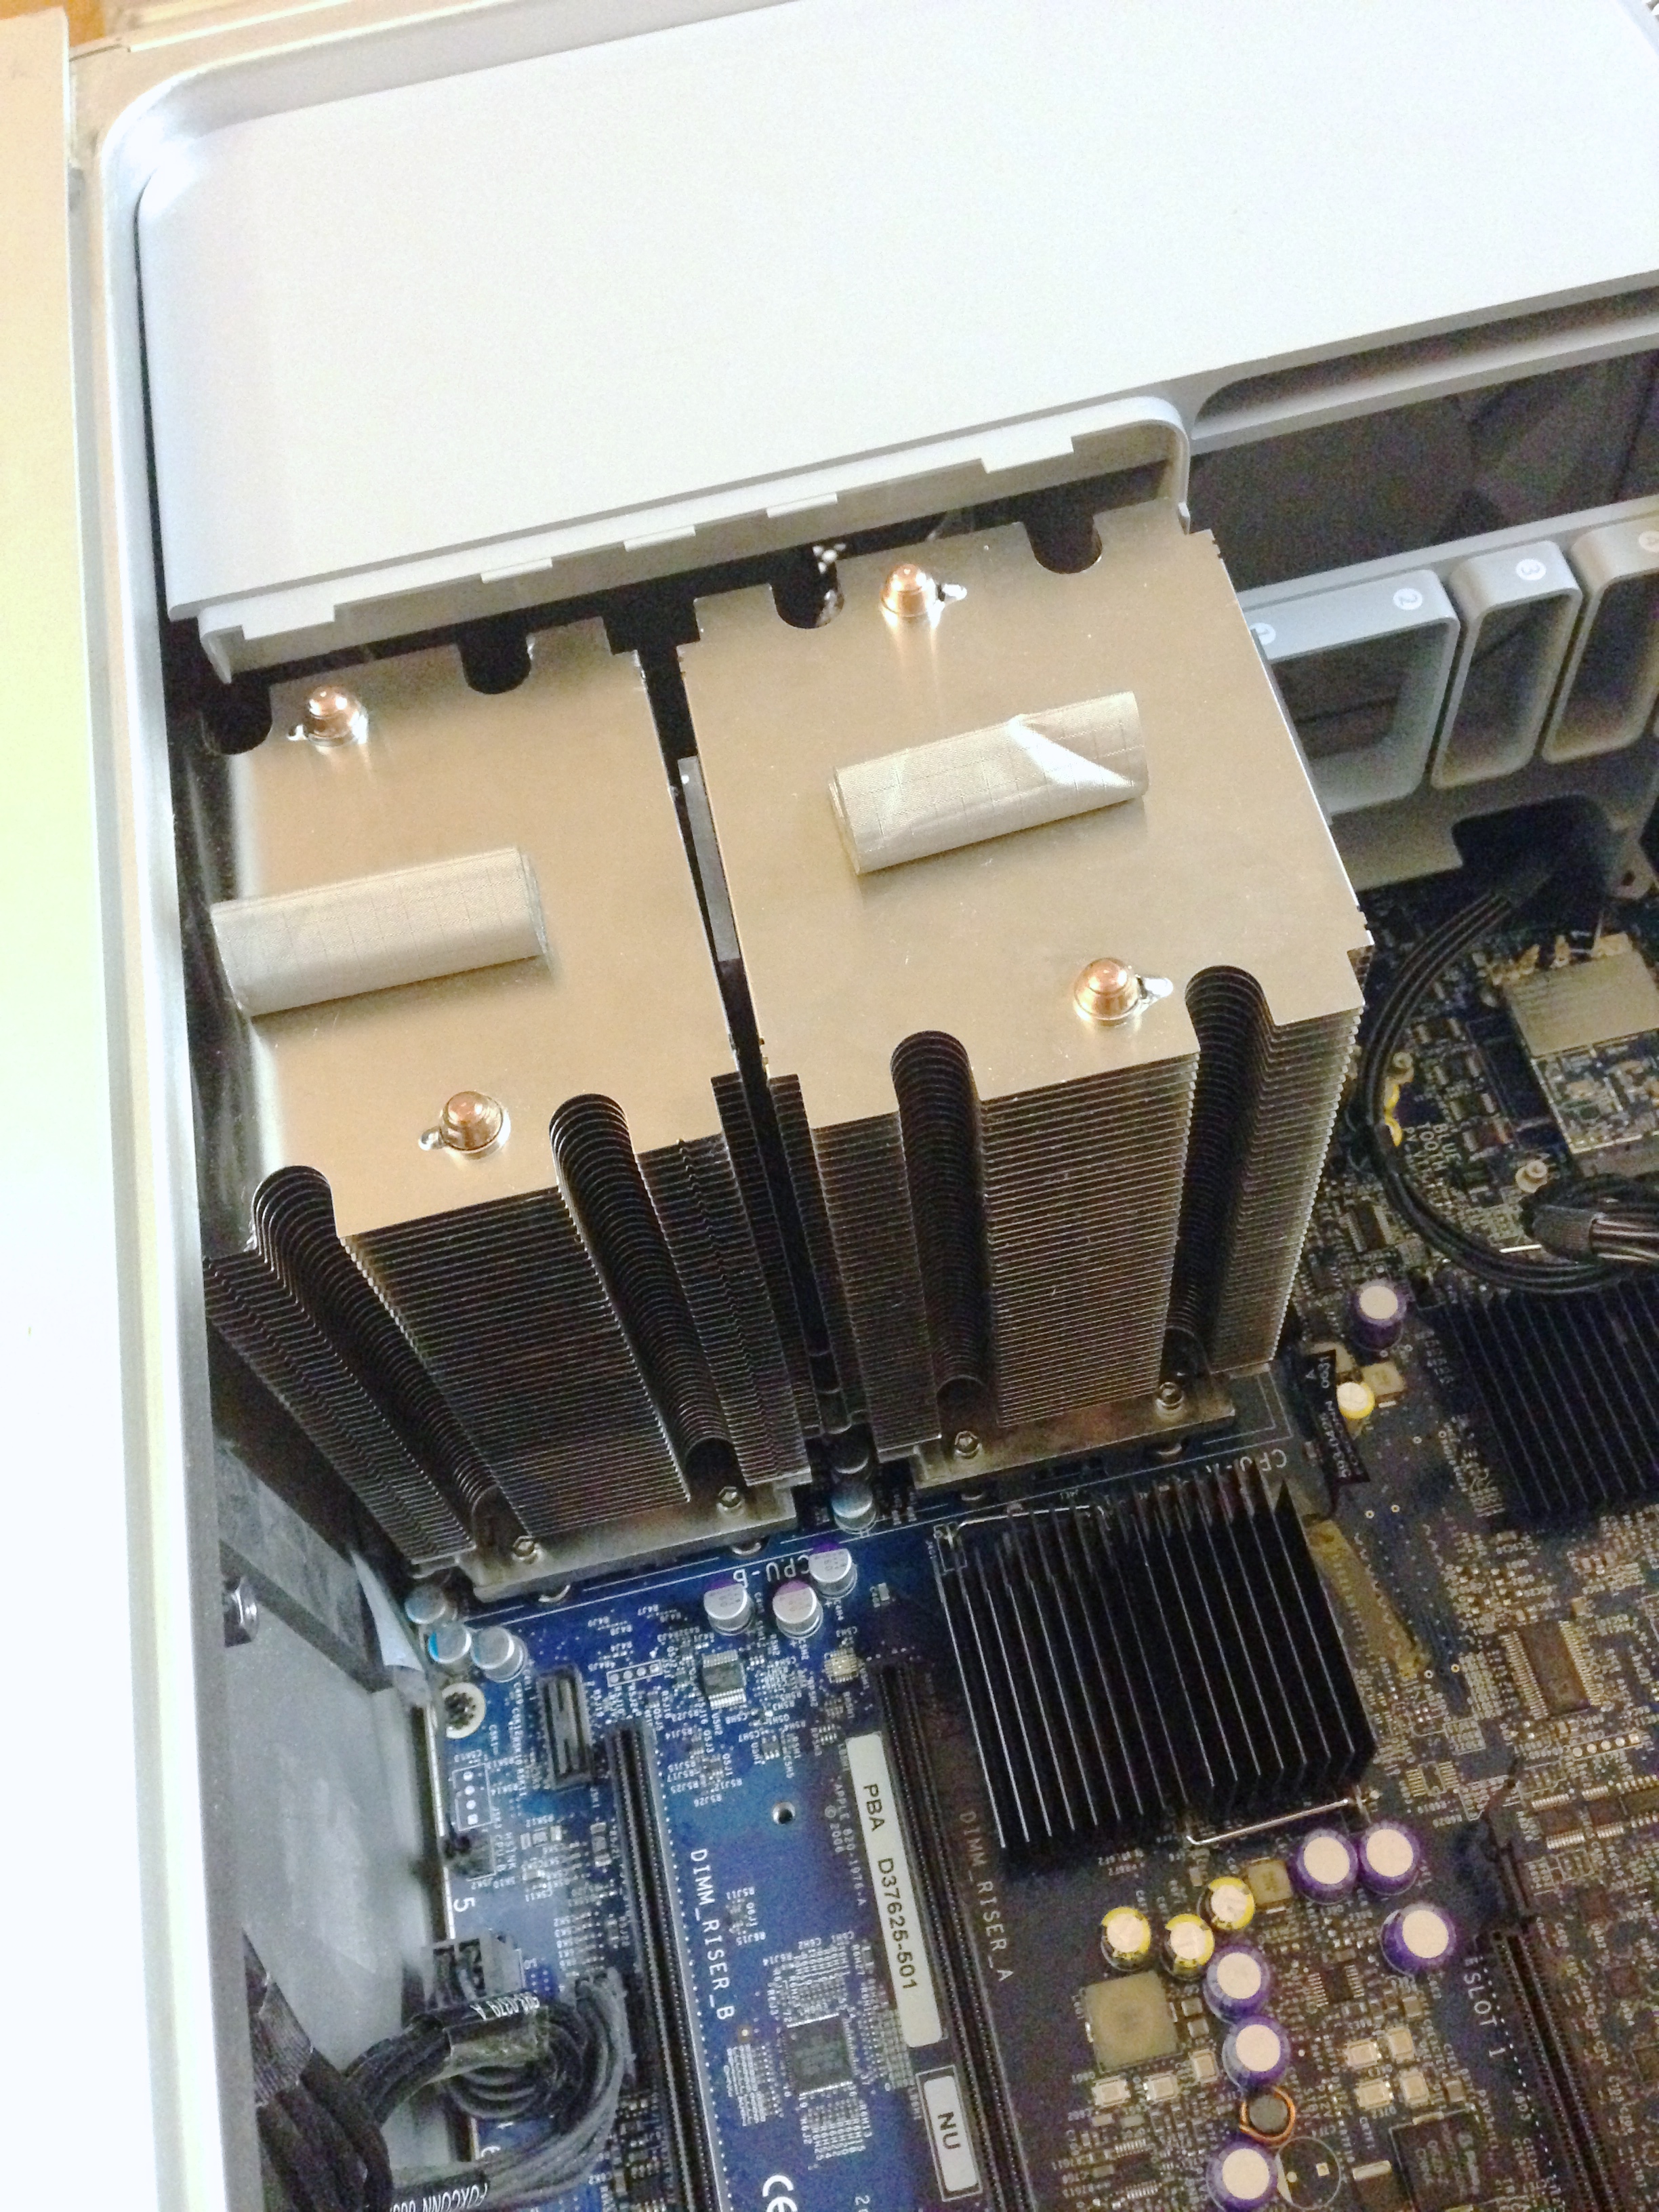
Here’s the upgrade process in pictures:
Memory risers held up by electrical tape.The two massive heatsinks!Heatsinks removedRemoving the original Xeon 5160’sNew CPUs installed!Cleaned off the old thermal paste on the heatsinksArctic Silver 5 appliedMemory Cage installed!Final product! (Sorry the picture is a little blurry on this one!)
Results:
The new geekbench score blew the old one out of the water! All in all, even though this Mac Pro is close 8 years old now, it still is a very fast machine!! I’m excited to try and rip some of my blu-ray movies for the Apple TV!
UPDATE: CPU1 is running about 15 – 20 C higher than CPU2… I might need to reapply thermal paste to one of the processors. It could also be that I didn’t tighten down the heatsink enough. I will fix it and let y’all know the results!